How to Soften Wood for Carving
Wood carving is very rewarding and creative; however, cutting through and working on it can be a challenge if the wood is too hard. Learning how to soften wood for carving is more than half the battle with this task, making it not only easier but also more enjoyable. Here’s an article to guide you through the most effective techniques and tips to get your wood in shape for carving.
Understanding Wood Hardness
The type of tree varies the degree of hardness for woods. For softwoods like pine or basswood, a beginner may want to use; for hardwoods, however, oak and maple are best softened. Knowing the hardness of wood allows you to determine the best way to soften the wood for carving.
Choosing the Right Wood for Carving
When selecting the wood you will use in your projects, you should consider what type of carving you aim to do. For starters, start with the softer woods. When they gain experience, they can switch to the harder ones. In this way, you will understand how to soften a piece of wood for a carve, and all the job will become easy.

Best Woods for a Beginner
1. Basswood: Very soft, easily carved, and available. Has fine, even grain.
2. Butternut: Very similar in many regards to basswood, but with rich, warm color and distinctive grain patterns.
3. Pine: Available very widely and cheaply, however, often marked with knots, which are very difficult to carve.
4. Cedar: Heavily fragrant wood and light but at risk of splinting easily.
Soaking Method
One of the simplest methods to make wood soft is soaking. Plunging the wood into water renders it almost soft in many scenarios. It works well with large pieces and designs. Here is how to do that:
- 1. Gather Container: You should have a huge tub or basin that can hold your piece of wood. Its cleanliness will not allow dirt to contaminate your wood.
- 2. Soaking the Wood: Place the wood into the water and make sure it’s covered with water entirely. This is possible by piling the wood with bricks or stones to allow it to be engulfed in water entirely.
- 3. Time: It takes one or more days depending on the size and hardness to soak the woods. Now check them every sometimes.
- 4. Drying: Remove the wood from the water and dry it wholly after it softens up so that there won’t be any effects when carving due to moisture.
Benefits of the Soaking Method
- Non-invasive Process: It doesn’t damage the wood fibers at all.
- Workability Improvement: Soaked wood becomes more workable so finer details could also be done efficiently.
- Natural Use: Only water is used during the process; it means this is an eco-friendly method for preparing wood.
Microwave Method
This microwave method is very useful for those who wish to resolve problems with time. The method attacks wood quickly using both moisture and heat. This is how you can do it safely:
1. Container: microwave-safe container with lid, just make sure it is wide enough to accommodate the piece of wood.
2. Add water: The small amount of water added to the container will create steam. It should not, however, be filled with water to prevent wood submersion.
3. Heat in Intervals: Microwave the container in 30-second to 1-minute intervals. Now, check the softness of the wood once in each interval, and do not let the wood get overheated.
4. Cooling: Leave the wood to cool as you start carving. You should be extra careful while handling it because, after the microwave, it is hot.
Advantages of the Microwave Method
• Time: This process is one of the quickest means of softening a piece of wood; hence, it saves you ample time when work is needed urgently.
• Control: It is easy to monitor the level of softness of the wood so that it is soft but not excessively so.
• Convenience: This is one method that you find most people have a microwave in their homes, hence making it available for use.

Using Chemicals
For more aggressive work, some chemicals can make the wood fibers soften effectively. Such products can be glycerin or specialized softeners made for wood that can be applied to the surface of the wood. The following is how they are used:
1. Choosing the Right Product: Select the right wood softeners that are made for carving or general woodwork.
2. Apply the Chemical: Use a brush or cloth to apply the softener evenly on the wood surface. Use it all out for optimal results.
3. Soaking Period: Depending on the manufacturer’s instructions, soak the wood for a few hours up to overnight.
4. Rinse Off Excess: Once you have spent the soaking time, rinse the wood off to get rid of the excess chemicals to work on it. How to Soften Wood for Carving
Advantages and Disadvantages of Using Chemicals
• Accuracy: It ensures accurate and targeted softening of areas.
• Safety First: When working with chemicals, one always needs to wear gloves and a mask to ensure that safety is not compromised.
Proper Tools for Carving
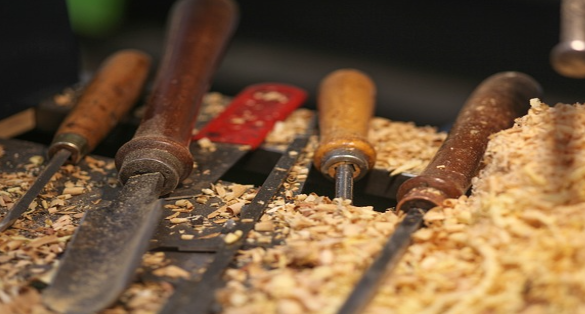
The key to fine wood carving is the tools that are used. Sharp, high-quality tools provide a great difference in how easily you can shape softened wood. You can also use these tools:
1. Carving Knives: A sharp carving knife is essential for fine cuts and finer details.
2. Gouges: These tools help create curves and deeper cuts that help create intricate designs.
3. Chisels: You will apply chisels for larger wood removal and refinement of shapes.
4. Whittling Knives: These are great for beginners and can be used on soft and hardwoods.
Taking Care of Your Tools
To enjoy your carving tools the most, keep them sharp and clean. Maintenance makes your tools last longer and improves the fun times in carving. You may want to invest in a touch-up sharpening stone or strop and store your tools immediately after How to Soften Wood for Carving them to avoid rust and deterioration.
Techniques for Carving Softened Wood
Once softened enough, wood can then be carved. Some of the techniques to begin with are as follows:
Start with a Sketch
Always draw your design on the wood before cutting it. From this drawing alone, you’ll get an even better vision of what you want to carve into the wood. Use a pencil or light marking tool, making your drawing clear and easy to trace.
Work in Stages
Break your carving into stages. You can do it by first of all the rough shaping-getting rid of most material that doesn’t look much like part of your design then you gradually proceed to finer details. This way, you don’t have to get all this done in one sitting.

Apply the Right Procedure
• Scooping: For deeper cuts, you scoop out bigger chunks of wood.
• Whittling: creates small, controlled cuts. This comes in handy when creating fine details.
Train Patience
Carving is not an activity that accelerates. During this process, never hurry its pace. What will happen is you will take your time in carving intricately designed pieces.
Safety Precautions
Safety factors are developed when handling sharp tools and wood. There are some important precautions:
- Protective Gears: Use protective goggles to protect the eyes from wood shavings, and carry a dust mask while sanding.
- Maintain your Workspace Clean: Ensure your workspace is tidy, and almost without any debris; this will reduce the likelihood of encountering accidents.
- Carve Away from Your Body: Carve away from your body to minimize the possibility of injury to yourself.
- Holding Your Wood: Observe how to secure your workpiece at the time of carving. This may involve a clamp or vise, holding the piece in place and minimizing its movement for precision.
Conclusion
Making How to Soften Wood for Carving is one of the most important steps in wooden carving. You shall find the techniques as well as the tools shall help make it as enjoyable and rewarding to you as possible. Either being a novice or an expert, mastering the techniques shall elevate your craftsmanship, and inspire your creativity. Let us begin our woodworking journey today so that we may enjoy carving.
FAQ’s
- Should you soak wood in water before carving?
Ans: Yes, soaking wood in water before carving can make it softer and easier to work with. It helps you carve more smoothly, especially with harder woods.
- Does boiling wood make it easier to carve?
Ans: Yes, boiling wood can make it easier to carve by softening the fibers. This helps you cut and shape the wood more easily.
- How to soften wood at home?
Ans: You can soften wood at home by soaking it in water for several hours or steaming it over boiling water. Both methods help make the wood easier to carve.
- How long to soak wood in water?
Ans: You should soak wood in water for a few hours to a couple of days, depending on its size and type. Check it regularly to see if it’s soft enough for carving.
- Can water damage wood?
Ans: Yes, water can damage wood if it’s left wet for too long, causing it to warp or rot. Always dry the wood thoroughly after soaking to prevent these issues.
- How much water will damage wood?
Ans: Even a small amount of water can damage wood if it’s left sitting on the surface for too long. Prolonged exposure, especially in high humidity, can lead to warping or mold.
- Is wood sensitive to water?
Ans: Yes, wood is sensitive to water and can absorb it easily. This can cause swelling, warping, or even mold if it stays wet for too long.
